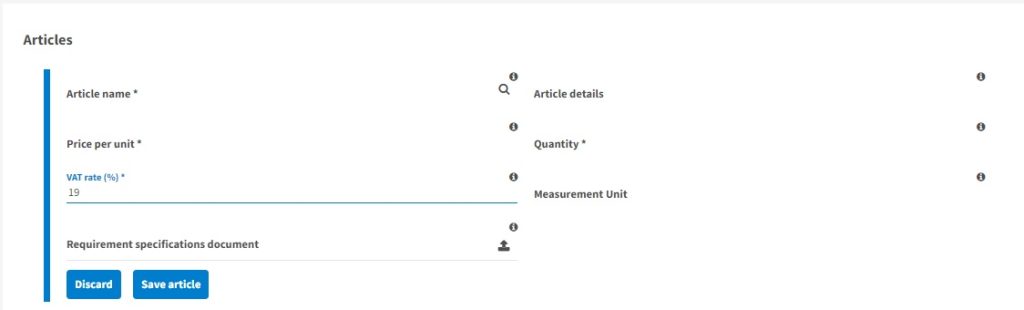
Step 3: Adding items
Enter the requested information:
- Item name – mandatory – selection from the list of products, services, works that is unique to the organization. If you want to request an item that is not listed, contact the procurement department for item addition. Once added, it will be available to all departments.
- Item details – optional – a text field where a brief description of the selected item can be entered if necessary.
- Unit price – mandatory – Enter your estimate of the price of the respective item. This estimate is necessary considering the legislative provisions, as the first step in the market prospecting process.
- Quantity – mandatory – enter the required quantity.
- VAT rate – mandatory – it is default at 19%, but can be modified if you request items to which a different VAT rate applies.
- Specifications – optional – for products, services, or works of high complexity, you can upload specifications or a descriptive document. The attachment will accompany the item throughout the procurement process. Maximum file size: 10 MB. Accepted formats: pdf, docx, doc, ppt.
- Save item button – Saves the entered information.
- You can add a maximum of 50 items within a Purchase requisition.